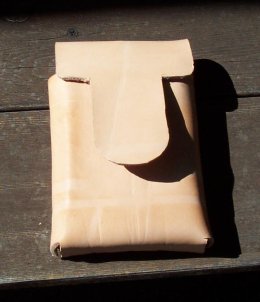
 Well, sure enough, the leather was mostly dry in the morning!
With the flask removed, it was nicely rigid and held the form nicely.
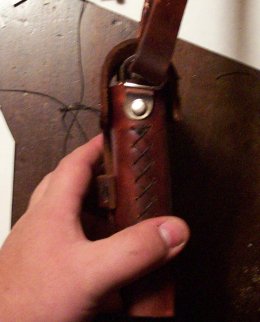
 Now
it was time to dye and finish the leather (as I was instructed by Helpful
Salesperson At The Leather Store). I put on some latex gloves and
began applying the dye. The process was actually pretty simple,
although I'm not skilled enough yet to get a completely even color
result. However, the slight variations are quite visually appealing. This
shot is after the first coat of dye.
Now
it was time to dye and finish the leather (as I was instructed by Helpful
Salesperson At The Leather Store). I put on some latex gloves and
began applying the dye. The process was actually pretty simple,
although I'm not skilled enough yet to get a completely even color
result. However, the slight variations are quite visually appealing. This
shot is after the first coat of dye.
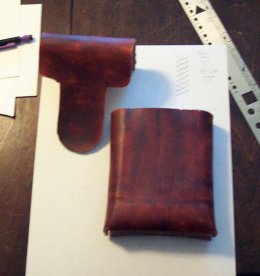
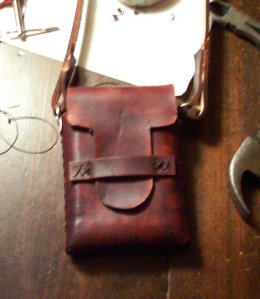
.jpg) Here
is the pouch after a second coat of dye and two coats of a satin leather
finisher (to lock the dye in place and stop it from rubbing off).
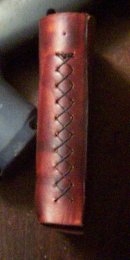
You can see here I did a couple of test stitching patterns, ultimately
settling on a nice cross-stitch pattern.
Here
is the pouch after a second coat of dye and two coats of a satin leather
finisher (to lock the dye in place and stop it from rubbing off).
You can see here I did a couple of test stitching patterns, ultimately
settling on a nice cross-stitch pattern.
 Speaking
of stitching, it was that time! I carefully drew precise drawings of
where my holes would go. Unfortunately, you can't see the marks on
the paper, but you can see how I taped it to the bottom. Then I used
the sharp point of my compass to make small indentations which would later
serve as a guide for the drill (no awls were harmed in the making of this
pouch!).
Speaking
of stitching, it was that time! I carefully drew precise drawings of
where my holes would go. Unfortunately, you can't see the marks on
the paper, but you can see how I taped it to the bottom. Then I used
the sharp point of my compass to make small indentations which would later
serve as a guide for the drill (no awls were harmed in the making of this
pouch!).
 Here
you can see the imprints for the holes to be drilled.
Here
you can see the imprints for the holes to be drilled.
 And
here is after drilling the holes.
And
here is after drilling the holes.
 The
stitching process can be tricky. As the leather is quite tough, I
followed Helpful
Salesperson At The Leather Store's advice, and used long needle-nose
pliers to pull the needle & thread through each hole. This was
especially necessary in this case, where I couldn't really get my hand
inside the formed case to reach the needle without tools.
The
stitching process can be tricky. As the leather is quite tough, I
followed Helpful
Salesperson At The Leather Store's advice, and used long needle-nose
pliers to pull the needle & thread through each hole. This was
especially necessary in this case, where I couldn't really get my hand
inside the formed case to reach the needle without tools.
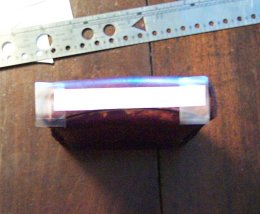
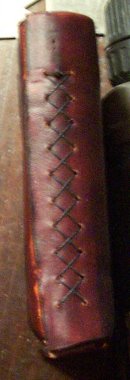
I completed the bottom stitching. Then, using a slightly wider cross-stitch pattern, did the sides. Here's the left side complete.
 The
right side, complete.
The
right side, complete.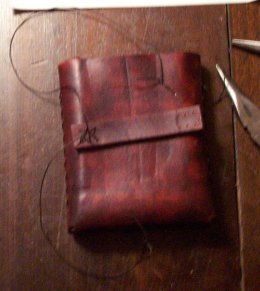 Next
I wanted to do the strap that holds the tongue of the flap in place.
This was a little tricky, as I wanted the leather to bow upward slightly
to accommodate the tongue of the flap,
so drilling the holes took concentration and three hands.
Next
I wanted to do the strap that holds the tongue of the flap in place.
This was a little tricky, as I wanted the leather to bow upward slightly
to accommodate the tongue of the flap,
so drilling the holes took concentration and three hands.
It's hard to see, but I had to cut my needles down a bit to clear the back of the pouch. I used a wire cutter to simply cut them in half, and I had a bit more room to work with inside the pouch.
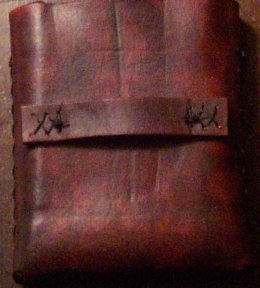 The
completed 'flap-strap.'
The
completed 'flap-strap.'
I then did what I consider the be the hardest part of the project. I sewed the top flap to the back piece of leather. This is just another reason to use a continuous piece of leather for your back piece and flap, rather than splitting into two like I did. Because the flap was formed to wrap over it made it very difficult to get to the inside of the pouch to pull a needle through. Eventually it came together nicely, though.
 Ok,
now that the stitching was finished, it was a relatively simple matter of
attaching the neck/shoulder strap to the pouch using rivets. Here's
where my flask-shaped wood piece actually came in handy! I slipped the
piece of wood into the pouch, and the flat part of the rivet on the inside
of the pouch had something to butt up against when I used the setting tool
to hammer the two parts together around the D-Ring clip.
Ok,
now that the stitching was finished, it was a relatively simple matter of
attaching the neck/shoulder strap to the pouch using rivets. Here's
where my flask-shaped wood piece actually came in handy! I slipped the
piece of wood into the pouch, and the flat part of the rivet on the inside
of the pouch had something to butt up against when I used the setting tool
to hammer the two parts together around the D-Ring clip.
If you are somehow without an Amazing Flask-Shaped Wood Piece, you will just have to settle for cutting a small piece of wood for the rivet to rest against.
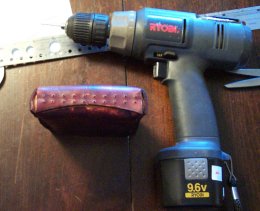
 Once
that was done, the Flask-Pouch was complete! (apart from filling with
spirits!)
Once
that was done, the Flask-Pouch was complete! (apart from filling with
spirits!)
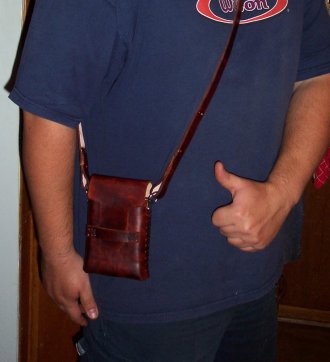 A
most satisfactory conclusion to this epic saga of intrigue, lust, and
crime... Er,
two day project!
A
most satisfactory conclusion to this epic saga of intrigue, lust, and
crime... Er,
two day project!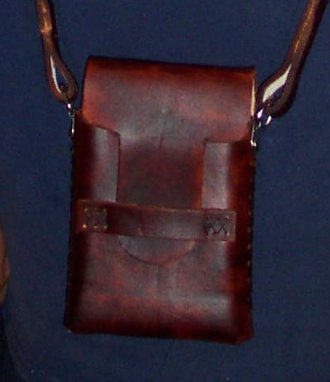 This
is the first draft of this journal. When I have a free moment, I
will make the images clickable for high-resolution versions of the photos.
This
is the first draft of this journal. When I have a free moment, I
will make the images clickable for high-resolution versions of the photos.
In the next few weeks I plan on posting the pattern if you care to make one yourself, including tools needed, materials required, and exact measurements including stitch patterns.
So please stop by again soon! I hope you enjoyed the tale.
Spectrum