 In October 2003, I was preparing to attend the Texas Renaissance
Festival. Everything was going well, and in fact I had actually
laundered my costume for the first time in three to four years (an
authentic aroma and food stains are period dress, man!). As I've
collected my costume parts over the years, I've assembled all sorts of
'accessories,' such as different swords, a self-made belt, a wooden
tankard (essential for ale consumption), a leather pouch, and various
other items.
In October 2003, I was preparing to attend the Texas Renaissance
Festival. Everything was going well, and in fact I had actually
laundered my costume for the first time in three to four years (an
authentic aroma and food stains are period dress, man!). As I've
collected my costume parts over the years, I've assembled all sorts of
'accessories,' such as different swords, a self-made belt, a wooden
tankard (essential for ale consumption), a leather pouch, and various
other items.
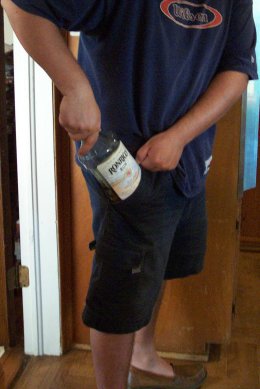
However, I realized (on the Tuesday before the festival weekend, of course) that my current status of being on the Atkin's Diet was somewhat incompatible with the most important part of all ren-fests: Drinking! I would be unable to have my mead or ale. However, spirits are A-OK on the diet, and mixed with a little diet coke, would hit the spot nicely. What I needed was a flask!
 Now
I really didn't want to just buy a flask and have it banging around in my
pocket all day at the faire. What I needed was some kind of holster
or form-fitting pouch I could either wear over my shoulder or clip onto my
belt. After a bit of searching on the internet, I could find neither
option! Plenty of different types of flasks are available, but no
real holsters or pouches.
Now
I really didn't want to just buy a flask and have it banging around in my
pocket all day at the faire. What I needed was some kind of holster
or form-fitting pouch I could either wear over my shoulder or clip onto my
belt. After a bit of searching on the internet, I could find neither
option! Plenty of different types of flasks are available, but no
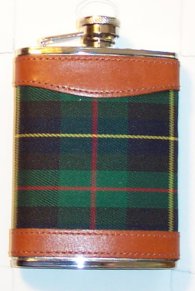
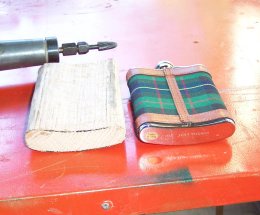
real holsters or pouches.Armed with a vision in my head of an over-the-shoulder flask pouch(actually worn over the neck, with the flask dangling on the opposite side of your body), I found a Celtic store in Dallas who had several different styles. I selected a simple (and cheaper) flask with a leather cover and a tartan pattern. It held 7 oz. of fluid. If if may digress for a moment, I really liked the round-style flasks, but they were only 4 oz. and I felt I might require a bit more spirit to raise my spirits, so to speak.
 Now
that I had my flask, I needed to do some serious education on
leatherwork. So the second stop was the a local leather/crafts
store. I must have spent nearly an hour and a half there, running my
ideas past a very helpful salesperson. Surprisingly, there was no
existing pattern that he knew of for a flask pouch. It looked like I
would have to do some design work as well!
Now
that I had my flask, I needed to do some serious education on
leatherwork. So the second stop was the a local leather/crafts
store. I must have spent nearly an hour and a half there, running my
ideas past a very helpful salesperson. Surprisingly, there was no
existing pattern that he knew of for a flask pouch. It looked like I
would have to do some design work as well!
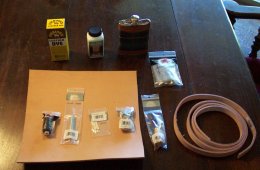
All told, I spent about $50, ten of which was the actual leather cost. The rest was things like dye, finish (used after dyeing leather), d-rings, rivets, a rivet setter, needles, brown waxed thread, and a scratch awl (looks like an ice pick, used to poke holes through the leather before stitching). Of course, any other leather projects I start in the future will only cost me the price of the leather, as I have the rest of the store.
 Back
home with my loot, I needed to flesh out my initial design, which was two
pieces of leather stitched together to form the 'cup' for the flask.
As you'll read later on, I ultimately decided on a three-piece design,
with the flap being a separate piece. This is what those in the
leather-craft industry call a Bad Idea. The flap should be an
integral part of the bottom piece of leather, saving yourself stitching
the flap to the bottom piece.
Back
home with my loot, I needed to flesh out my initial design, which was two
pieces of leather stitched together to form the 'cup' for the flask.
As you'll read later on, I ultimately decided on a three-piece design,
with the flap being a separate piece. This is what those in the
leather-craft industry call a Bad Idea. The flap should be an
integral part of the bottom piece of leather, saving yourself stitching
the flap to the bottom piece.
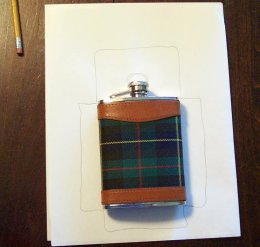
Ah well... On with the story! I hand-sketched some designs on paper...
 ...and made a crude mockup around the flask It looked pretty
good to me!
...and made a crude mockup around the flask It looked pretty
good to me!
 Now,
being the smart guy that I am, I decided I would need something the same
shape of the flask to mold my leather around. So I found an old
board about the right size, cut it, and used a wood grinder to get the
resemblance of my flask's shape. I thought I did pretty good.
Now,
being the smart guy that I am, I decided I would need something the same
shape of the flask to mold my leather around. So I found an old
board about the right size, cut it, and used a wood grinder to get the
resemblance of my flask's shape. I thought I did pretty good.Only later did I realize that a bit of plastic wrap around the original flask would protect it while I was molding the leather to the shape. Sigh. Maybe my 'AMAZING Wooden Flask RARE!!! NR!' will be a great Ebay item!
 Back
inside, I was ready to draw precise plans. After 30 minutes of
fruitless searching for graph paper, I made a run down the local grocery
store.
Back
inside, I was ready to draw precise plans. After 30 minutes of
fruitless searching for graph paper, I made a run down the local grocery
store.
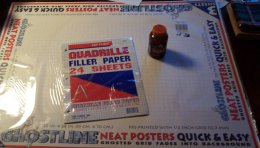
What I found there was much better than graph paper! They had some poster board with 1/2-inch graph squares preprinted on it. The poster board would make a much better template to trace onto the leather with, and would also simulate the leather a little better than flimsy paper. I also picked up a jar of rubber cement, as Helpful Salesperson At The Leather Store suggested using it to create a temporary bond between the leather surfaces while I was doing my stitching.
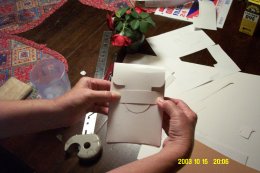 Back
with graph-poster in hand, I drew more precise designs, cut them out and
test-fit against the flask. It wasn't bad! The only thing I
wanted to do was extend the 'tongue' of the flap a bit more to ensure it
stayed put.
Back
with graph-poster in hand, I drew more precise designs, cut them out and
test-fit against the flask. It wasn't bad! The only thing I
wanted to do was extend the 'tongue' of the flap a bit more to ensure it
stayed put.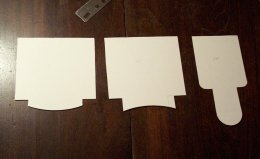 Second
round of designs, with the extended tongue.
Second
round of designs, with the extended tongue.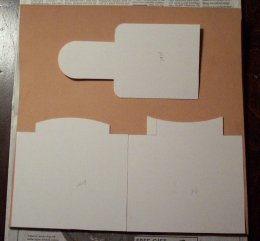 I
cut out the second designs, and was ready to use them as a template on my
leather!
I
cut out the second designs, and was ready to use them as a template on my
leather! After they were traced,
I went hunting for a good cutting tool. Exacto knives are just not
right for the job, as a lot of pressure is needed to cut through leather
this thick (8 ounce- 1/8" -- leather is measured in ounces, each
being 1/64" thick). The best tool I found was a sturdy box
cutter. Checking to make sure there were no airport security people
around, I cut out the pieces with the box cutter. Here are the
pieces sitting by the sink ready for a soaking!
After they were traced,
I went hunting for a good cutting tool. Exacto knives are just not
right for the job, as a lot of pressure is needed to cut through leather
this thick (8 ounce- 1/8" -- leather is measured in ounces, each
being 1/64" thick). The best tool I found was a sturdy box
cutter. Checking to make sure there were no airport security people
around, I cut out the pieces with the box cutter. Here are the
pieces sitting by the sink ready for a soaking!
 It
didn't take long at all for the leather to absorb the water, and bubbles
stopped rising within three minutes. I took the pieces out of the
water, patted any excess moisture off with some paper towels, and began
putting the pieces together.
It
didn't take long at all for the leather to absorb the water, and bubbles
stopped rising within three minutes. I took the pieces out of the
water, patted any excess moisture off with some paper towels, and began
putting the pieces together.
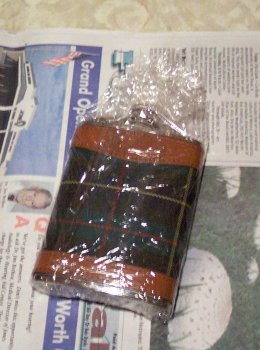
Here's the flask wrapped in plastic wrap, awaiting its cozy home!
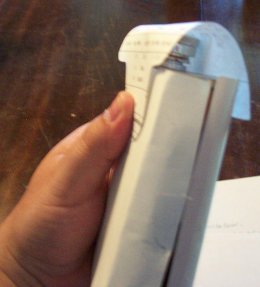
 Amazingly,
the pieces fit together quite nicely, and I applied rubber cement to the
areas where I would be stitching later. As you can see, I used a ton
of rubber bands plus some pens to better hold the entire tab of leather
together. Finally I put some rolled-up washcloths on the back side
of the flask, to hopefully encourage the leather to retain the nice curved
shape.
Amazingly,
the pieces fit together quite nicely, and I applied rubber cement to the
areas where I would be stitching later. As you can see, I used a ton
of rubber bands plus some pens to better hold the entire tab of leather
together. Finally I put some rolled-up washcloths on the back side
of the flask, to hopefully encourage the leather to retain the nice curved
shape.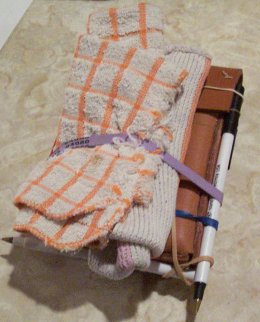 The
leather didn't appear to be drying very quickly, so I put it in the same
room as a window air conditioner, as the condenser coils remove humidity
from the air and would hopefully speed the process. Hopefully it
would dry overnight and tomorrow I could do some dyeing and stitchwork!
The
leather didn't appear to be drying very quickly, so I put it in the same
room as a window air conditioner, as the condenser coils remove humidity
from the air and would hopefully speed the process. Hopefully it
would dry overnight and tomorrow I could do some dyeing and stitchwork!